Designing and Machining My Own Custom Putter
A Journey from Concept to Reality
Harrison Say
6/1/20243 min read
Since the early days of the COVID-19 pandemic, I have been captivated by the game of golf. However, my interest often fades from the game to the equipment behind it—specifically the craftsmanship that goes into making golf clubs. This passion culminated in one of my most rewarding projects to date: designing and building my custom putter.
The idea for this project was sparked by one of my college roommates, Daniel, who has played golf his entire life. After seeing his Scotty Cameron putter, I was intrigued by the cult following and the high price tag, largely driven by brand reputation and professional endorsements. As an engineering student, I saw an opportunity to create a custom putter of my own, applying the skills I had acquired in both design and machining. This project would not only fulfill a personal goal but also serve as a fun capstone for my time in school.

Initial Concept and Design Process
Inspired by classic blade-style putters such as the Ping Anser and Scotty Cameron Newport, I set out to design a putter that was both aesthetically pleasing and highly functional. My goal was to achieve a high Moment of Inertia (MOI) to enhance stability while also keeping a standard head weight of 300-350 grams.
I modeled the putter using SolidWorks, applying the principles I had learned through my CSWA certification to ensure the design was optimized for both performance and manufacturability. This process involved numerous iterations over the course of several months, as I refined the geometry to make the putter more machine-friendly. Key considerations included reducing the number of complex interior angles, which would complicate machining, while maintaining the balance and feel necessary for a high-performance club.
Machining the Final Putter
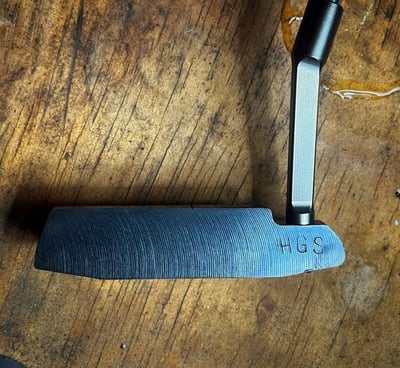
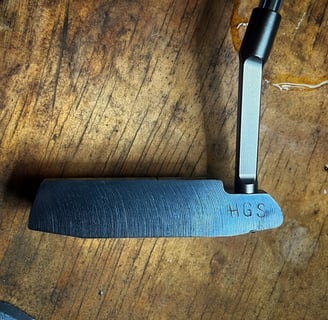
The putter began as a single block of 1018 carbon steel, and the initial blank was precision-cut on a HAAS CNC machine, which allowed me to achieve the exact design I had modeled. The next step in the process was milling the loft angle on the face, which I completed by hand using a Bridgeport milling machine. This manual procedure ensured the putter had the optimal 4 degrees of loft to start the ball rolling smoothly on the green every putt.
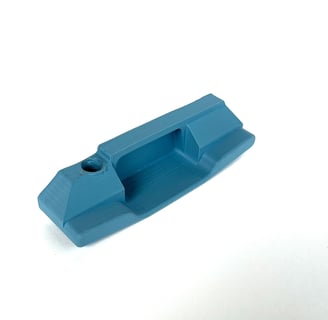
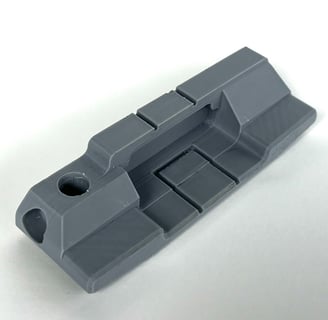
Prototyping with 3D Printing
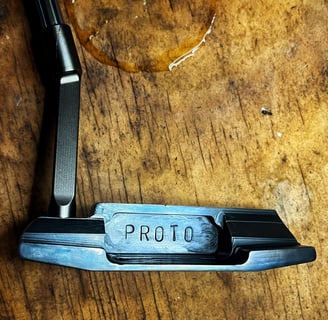
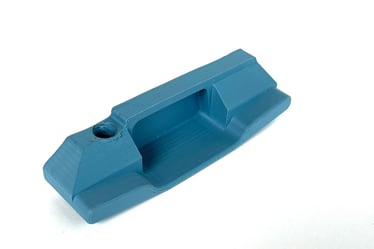
To visualize and refine the design, I used my 3D printer to create prototypes. These printed models allowed me to assess the aesthetics of the design before committing to the final machining process. Additionally, these prototypes allowed for quick and productive discussions with Mr. Neil, the machinist at Louisiana Tech’s machine shop, where we explored ways to streamline the design for CNC machining.
3D printing proved to be an invaluable tool in the design process, allowing for rapid prototyping and iterative refinement. Each prototype brought me closer to a final design that was both visually appealing and practical to manufacture.

After machining, the putter required additional grinding to clean up milling marks. To protect the steel and enhance its appearance, I applied a cold-bluing treatment, giving the putter a sleek, darkened finish. While the CNC provided the foundation, the combination of manual milling and hand-finishing truly brought the design to life. The result is a high-quality putter that I’m proud to have designed and built from start to finish.


Academic Integration and Professional Development
This project was not only a personal passion but also an awesome part of my academic journey. I used the putter design as the project for a self-study design elective, earning three hours of college credit toward my degree. Throughout the process, I deepened my understanding of mechanical design, precision machining, and materials engineering—all critical skills for any mechanical engineer. I couldn't have completed this project without the advice of Dr. Kelly Crittenden and the experience of Mr. Neil Rinehart.
The project taught me valuable lessons in design for manufacturability (DFM), rapid prototyping, and the importance of collaboration with machinists and other experts in the field. As I transition from student to professional, I’m excited to apply these skills to future engineering challenges.

